The beds duly arrived with the rest of our shipped items (on several pallets) on a drizzly day in February 2010. From our arrival in early December 2009 until that date we'd been sleeping first on reclining armchairs (nice for a doze, not so great for a solid 8 hours every night), and then on newly purchased mattresses on the floor. We were very excited to have proper beds again, but upon reassembly we discovered to our chagrin that the American mattresses were 3-4" wider than the European beds, and 3-4" shorter too. We made do, letting the mattresses hang over the edges of the beds, and putting up with the slight list this imparted. In fact Beth very generously let me have the close-fitting thin foam mattress that came with one of the beds, so with that underneath my American mattress I did not suffer the reverse camber effect.
The beds came with us to Sweetwater with our next move, disassembled, and we reassembled one in the guest room, using the foam mattress to keep the bed level. We could house one guest in reasonable comfort, but this was never intended to be a permanent solution.
Fast forward to 2012, and now with a baby boy added to the Milner clan we wanted to get these beds sorted out. Not that baby Edward was going to sleep on one for a while, but so we could put up more than one guest and not make them seasick.
I made the best decision of my life when I married Beth, because among her other talents and interests she is a woodworker, and spent much of her own coin over the last two years outfitting a woodworking shop in our detached garage. The upshot of this is that she had the tools and skills to remake the beds parts necessary to widen the European bedframes to fit US mattresses.
After much measuring and remeasuring I went along to our local Jerry's timber yard in Beth's station wagon, and purchased the wood necessary to remake our beds. We needed 14 end pieces, and 45 slats. The beds are pine, but I discovered that Jerry's don't do pine. Fir is wannabe pine, so I bought four 14' lengths of 2"x6" kiln dried fir for the end pieces, and had them cut to 3'6" lengths, providing 16 pieces to work with. For the slats I got eight 12' lengths of thinner fir, not sure of the exact dimensions, but enough for 46 slats.
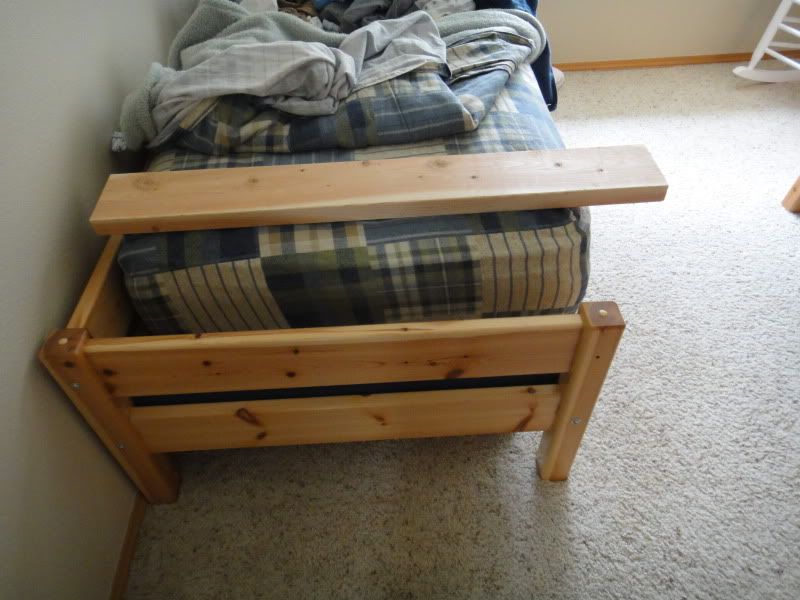
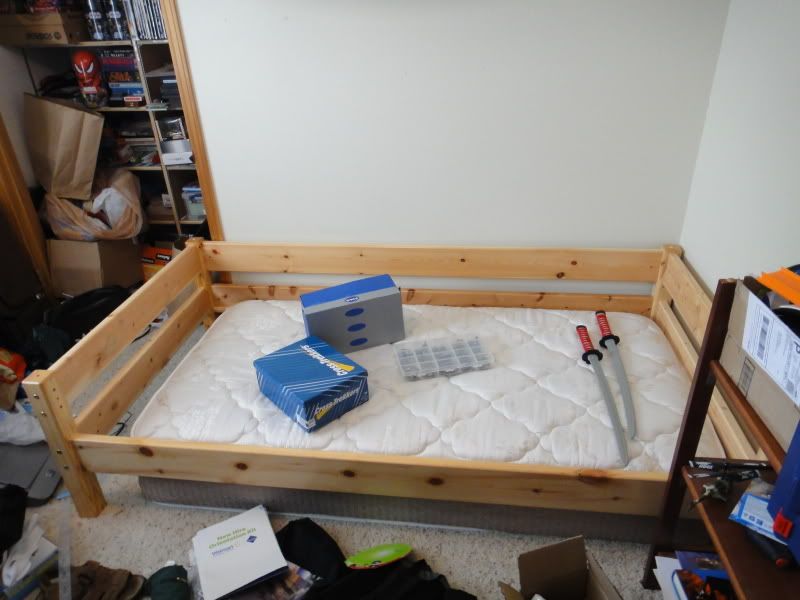
Here's one of the beds, with the US mattress hanging over the edge, and an untouched piece of 2"x6" fir showing what Beth had to work with. We had a few inches to spare on each piece, as planned. You can see the two pieces in the endframe that need to be replaced.

On the left, the original endpiece, with the blank next to it ready for working. To the right of that a single slat, with the unworked replacement next to it. This will be cut lengthwise to produce two slates.
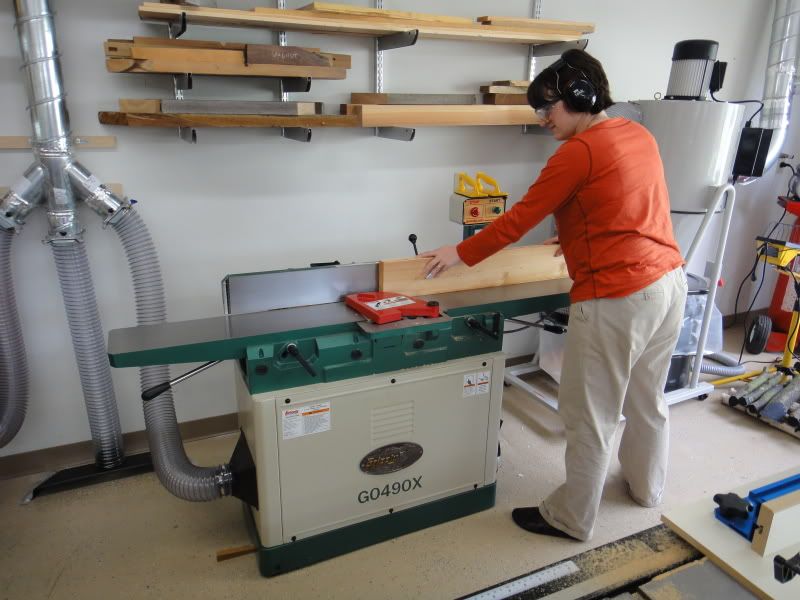
And so to the workshop. The first step is using the joiner to ensure the edges are and one side are square to each other. Note use of safety goggles, ear protection, and the dust collector.

Next is the planer, to square up the fourth side. For reasons I still don't quite fully grasp, the joiner can only do three of the four sides. The planer is also cutting to the right dimensions.


Cutting to length on the table saw. I should mention that none of the machines were on, these photos were just posed to show how they are used.
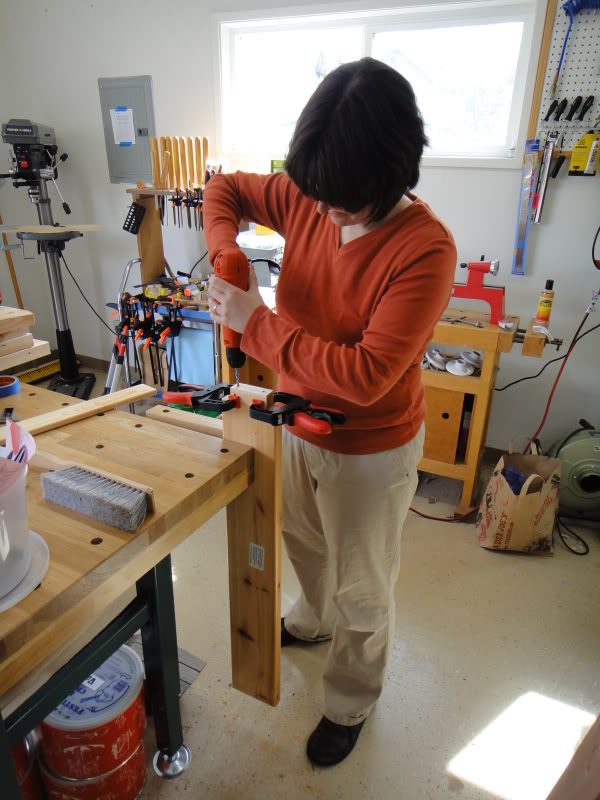
Starting the drill holes with a jig. The jig is a bit of scrap wood that Beth made the right holes in (using the drill press you can see in the corner) to act as a template. Center it on the end of the piece, clamp, and Bob's your uncle.
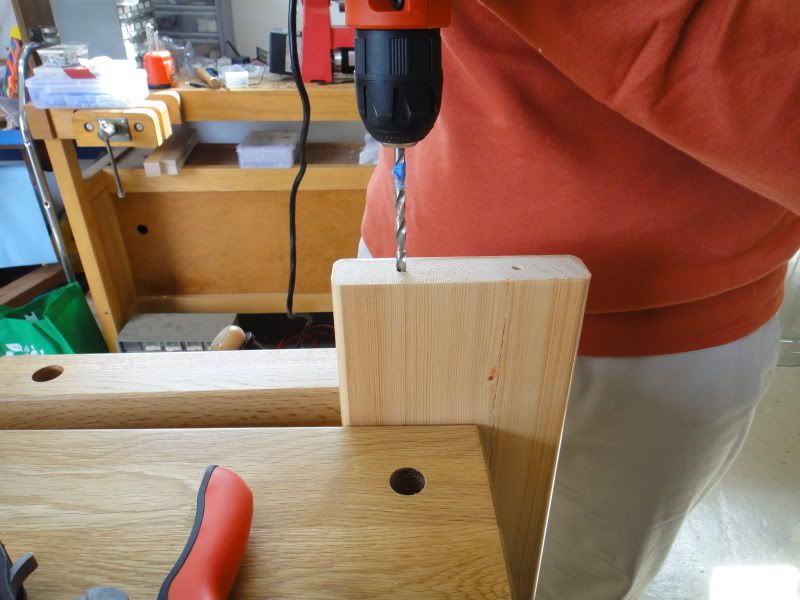
Having stated the holes, they are drilled to the corerct depth with the jig removed. The bit of blue tape on the drill bit denotes the necessary depth.
You may notice that the end of the bed overlaps the cupboard door behind it by a few inches. Those are the inches by which a US bed is shorter. We could cut a bit off the long sides and redrill all the holes to make it fit, and we might yet, but it's not really necessary. The cupboard door was already removed when we moved in, and when we put it back it we found it so wide that it's unwieldy in a small room, so it's tucked away under the stairs in Beth's wood shop. Eventually we'll probably have this bed up on its longer legs to make space underneath.
The end pieces fit, but have not yet been sanded or varnished. The slats we will measure to fit when the wood is dry enough, and they only take an hour on hands and knees to screw into place.
That's it so far. If we wanted to have a fourth twin bed, Beth has the skills, the tools, and a template to work from to create one from scratch. I doubt we'll be going into the furniture trade anytime soon, but it's nice to know we can do running repairs.

cool.
ReplyDeleteThat is the first picture where i have seen a woman behind the equipment and doing some awesome woodworking.Great job.The bed looks really nice.i will soon be doing a project that's very similar.
ReplyDeleteThey look great. I'm a big fan of wood frame beds, particularly log beds. There's something so natural feeling to them. I'm sure they give me a better night's sleep too.
ReplyDeleteWhen it comes to log beds, I will certainly consider those made with Barnwood because they are durable. They are bound to last a lifetime. I will certainly consider them.
ReplyDelete